
Have you ever wondered how to make a gua sha tool? What steps are involved, and which of these steps are crucial for determining the quality of the tool? If you’re curious, today’s article will answer your questions.
Make a gua sha tool generally involves the following steps:
- Material Selection
- Segmentation
- Processing
- Cleaning
- Quality Inspection
Let’s delve into each of these steps in detail.
1. How to Make A Gua Sha – Material Selection Standards
The standards for selecting materials for gua sha tools are not fixed. Different manufacturers have varying criteria, and even the same manufacturer might choose different materials based on individual customer orders. This largely depends on the business’s standards and the specific needs of the clients.
For us, unless a client explicitly requests lower-quality raw materials, we always opt for high-quality ones. For materials like crystal, we primarily source high-grade raw stones from Madagascar, Brazil, and South Africa. We conduct three rounds of screening for raw materials—at the source, upon entry to our facility, and before processing—to ensure that every piece meets our standards, thereby minimizing the risk of quality deterioration right from the start.
Many smaller factories may offer significantly lower prices, often due to the use of subpar raw materials (which can differ by over 50% in price from high-quality options). While this might seem cost-effective, it can lead to poor customer experiences and potentially damage the brand’s reputation, ultimately being counterproductive.
2. How to Make A Gua Sha – Stone Segmentation
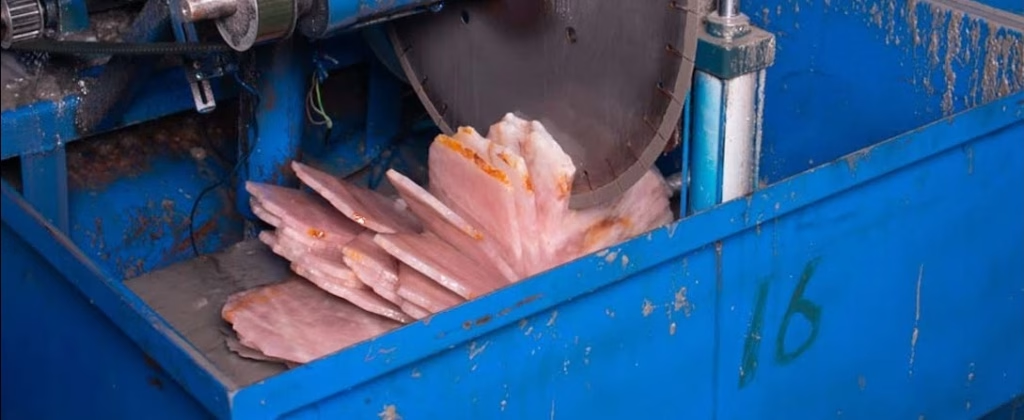
This step is straightforward: it involves cutting larger stones into sizes suitable for processing. Typically, the raw stone is sliced into slabs approximately 2 centimeters thick. Not all stones require cutting; for instance, smaller stones like tiger’s eye or amethyst often do not need to be segmented, while rose quartz and clear quartz do require cutting to that specified thickness.
3. Processing Techniques
This is the most intricate and multi-step part of the process, which includes drawing, shaping, fine grinding, and polishing.
- Drawing: A skilled designer draws the desired gua sha shape on the prepared stone slab. This requires technical expertise to maximize the number of gua sha tools cut from a single slab while avoiding areas with blemishes or cracks.
- Shaping: After the design is complete, the slabs are sent to the cutting area. The machines used here are much smaller and more precise. Craftsmen cut according to the drawn shapes to create the initial forms of the gua sha tools.
- Fine Grinding: The initially processed boards cannot be used right away, as their surfaces are rough and angular. Specialized tools are employed to smooth out these edges and achieve the required dimensions and thickness.
- Polishing: While the tools are close to their final form after fine grinding, they still have a matte finish. No amount of grinding will achieve the glossy look of a finished product. This is where specialized polishing tools come into play.These tools resemble large barrels filled with fine diamond dust or walnut wood. Through high-frequency vibrations, these small, hard materials polish the surface of the gua sha tools, resulting in a refined finish.
4. Cleaning
After polishing, the surface of the gua sha tools is coated with a layer of dust, primarily from the polishing process. Typically, rinsing each tool with clean water is sufficient to remove this residue. Once cleaned, the tools move on to the final step.
5. Quality Inspection
No company can guarantee a 100% yield rate, so it’s essential to inspect each gua sha board to ensure they meet sales standards. After passing quality inspection, your gua sha order is packaged and prepared for shipment.
These five steps outline the key processes involved in make a high-quality gua sha tool. Of course, there are many finer details that we cannot disclose, as they pertain to our company’s core secrets.